Ship Log
Understanding Ship Logs
First thing’s first, I’ll define some terminology regarding ship logs in the game, and how ship logs are structured.
Entries
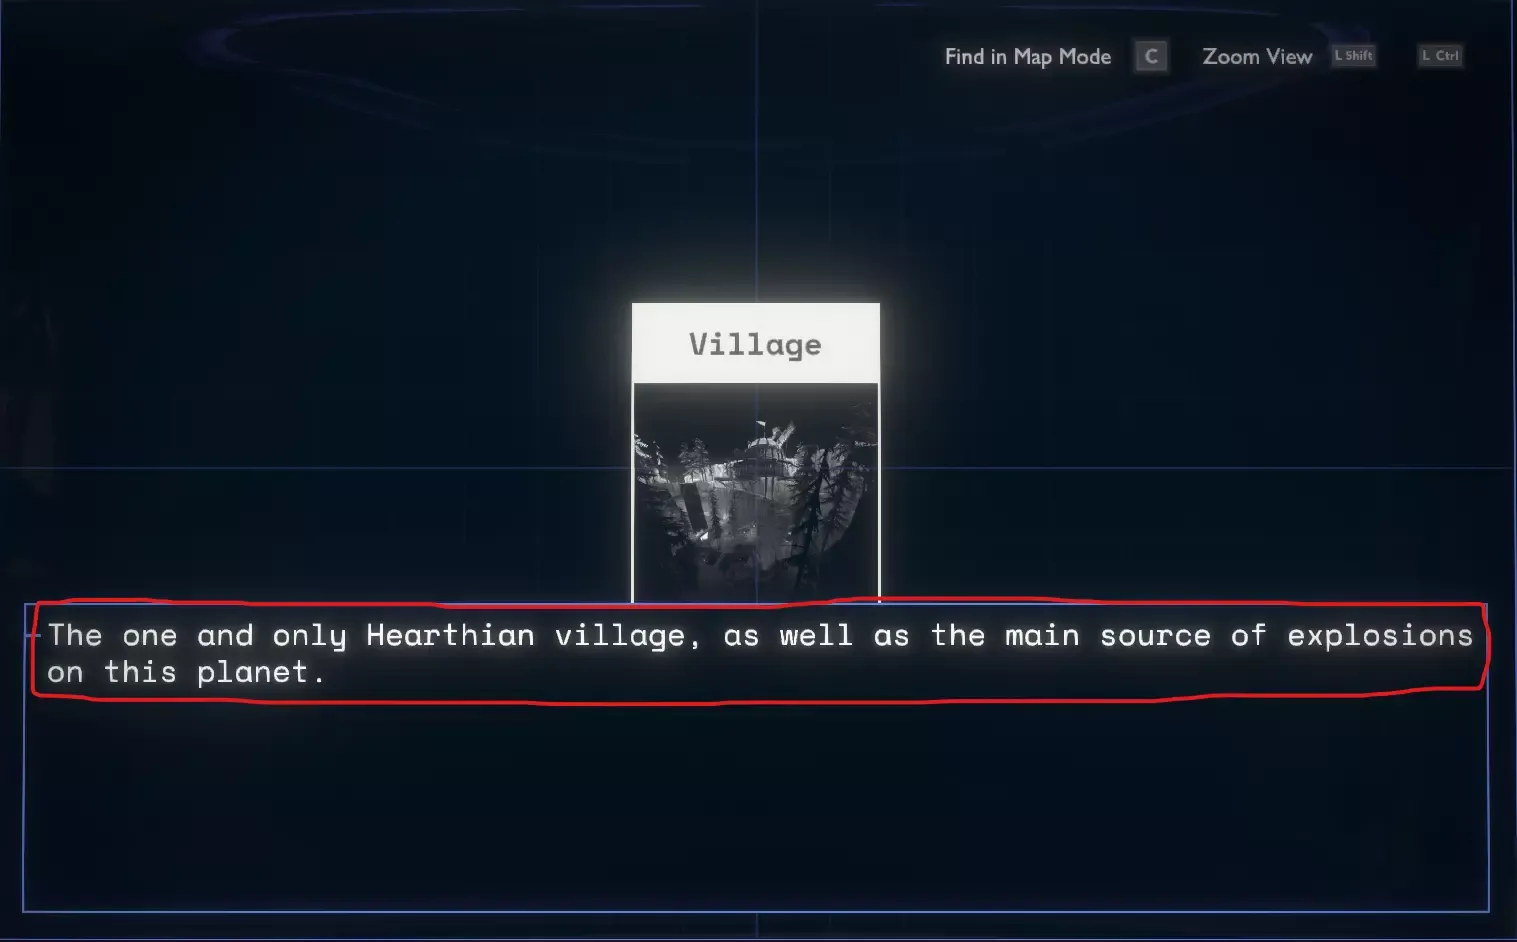
An entry is a card you see in rumor mode, it represents a specific area or concept in the game, such as Timber Hearth’s
village or the southern observatory on Brittle Hollow.
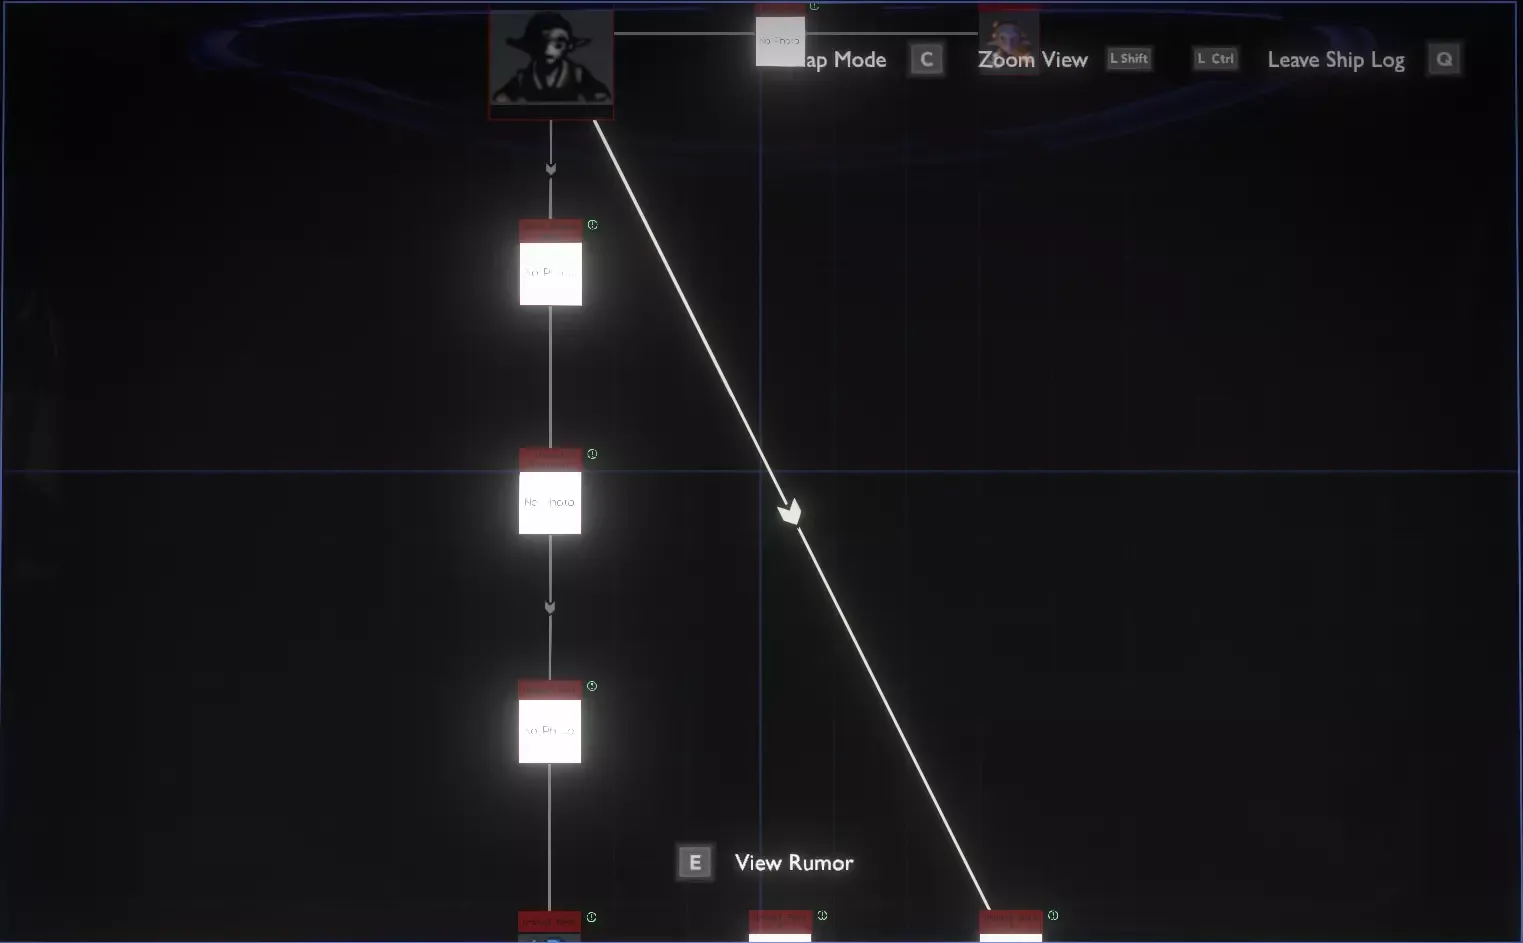
An entry is split up into facts, a fact can either be a rumor fact or an explore fact.
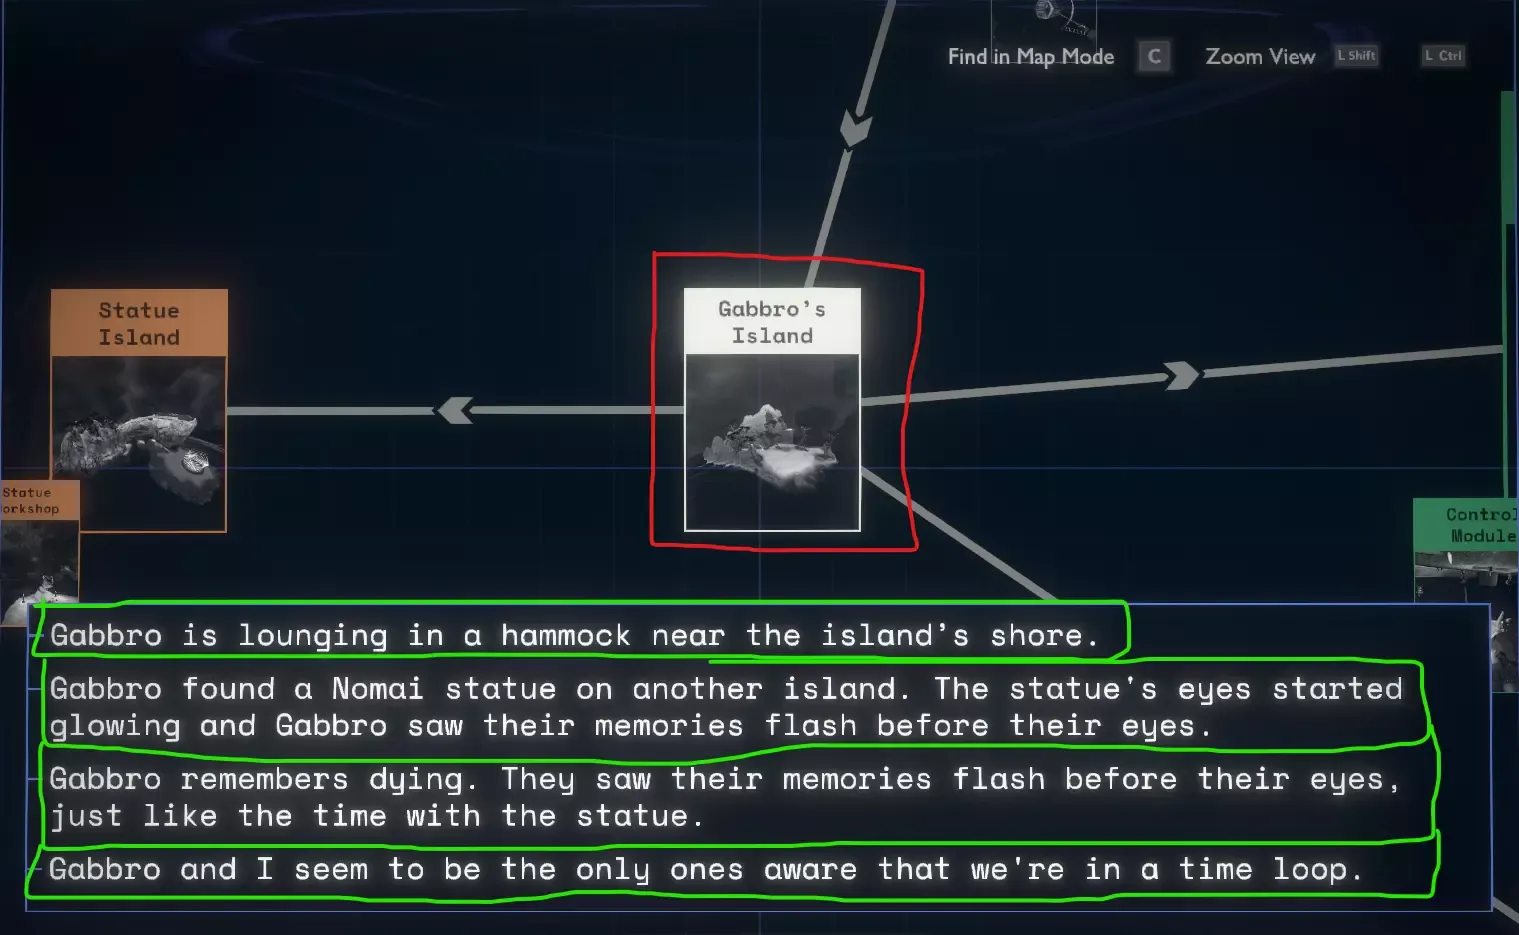 In red you can see an entry, in green you can see the entry’s facts
Curiosities
Curiosities are entries that represent big ideas in the story, such as the ATP or the OPC.
Non-curiosity entries have a Curiosity attribute that can be set to make the color of that entry match the color of the
curiosity (Like how everything regarding the Vessel is red)
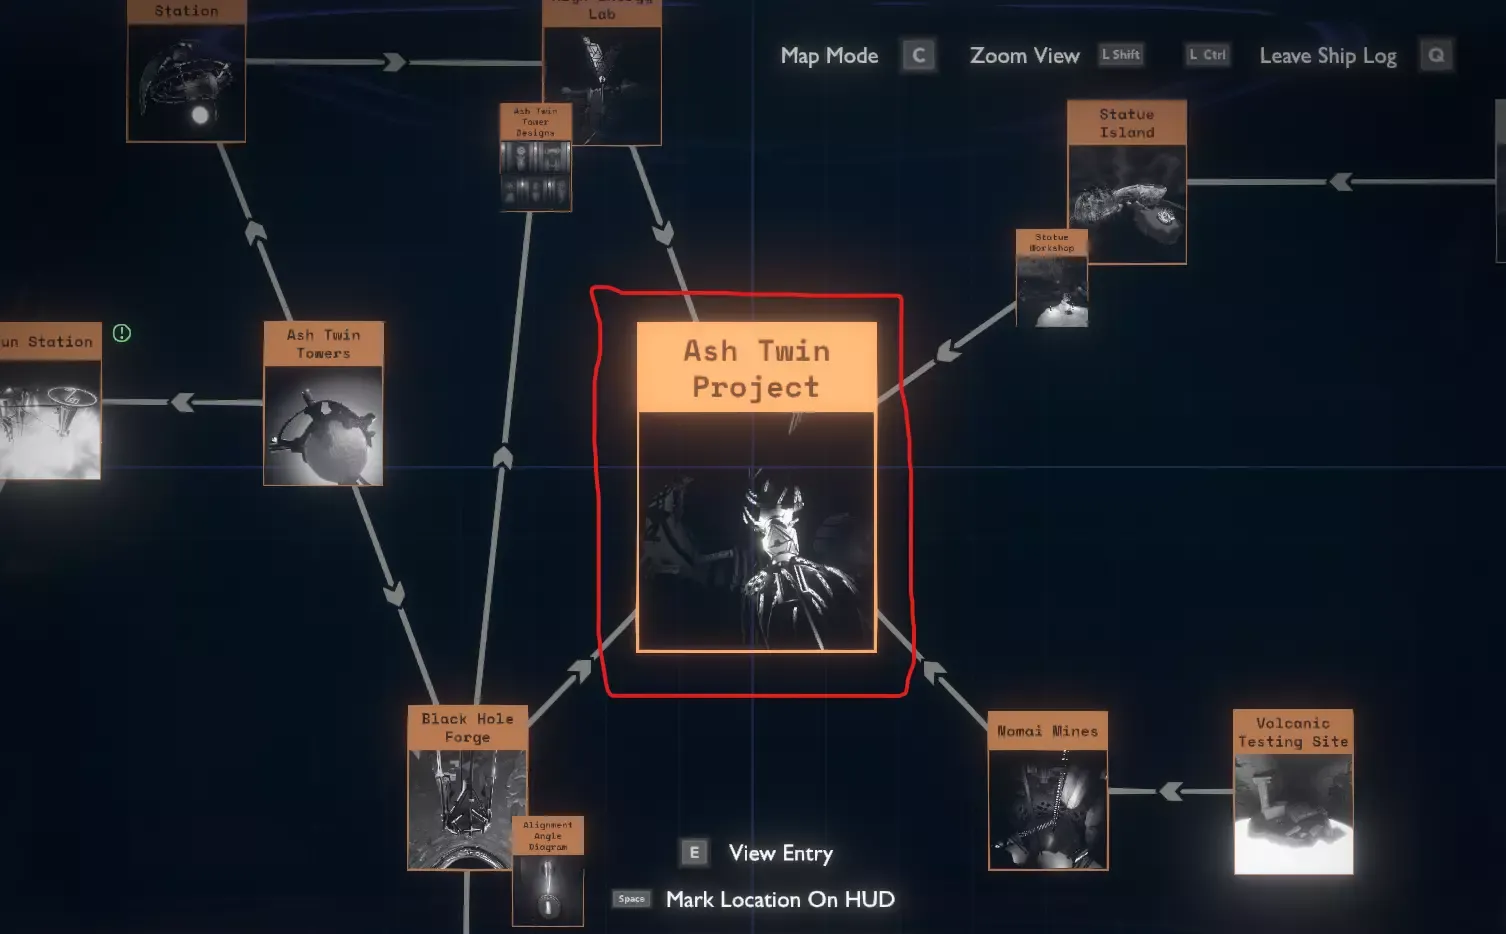 The Ash Twin Project is an example of a curiosity (internally it’s called TIME_LOOP)
Child Entries
Entries can be children of other entries, meaning they’ll be smaller.
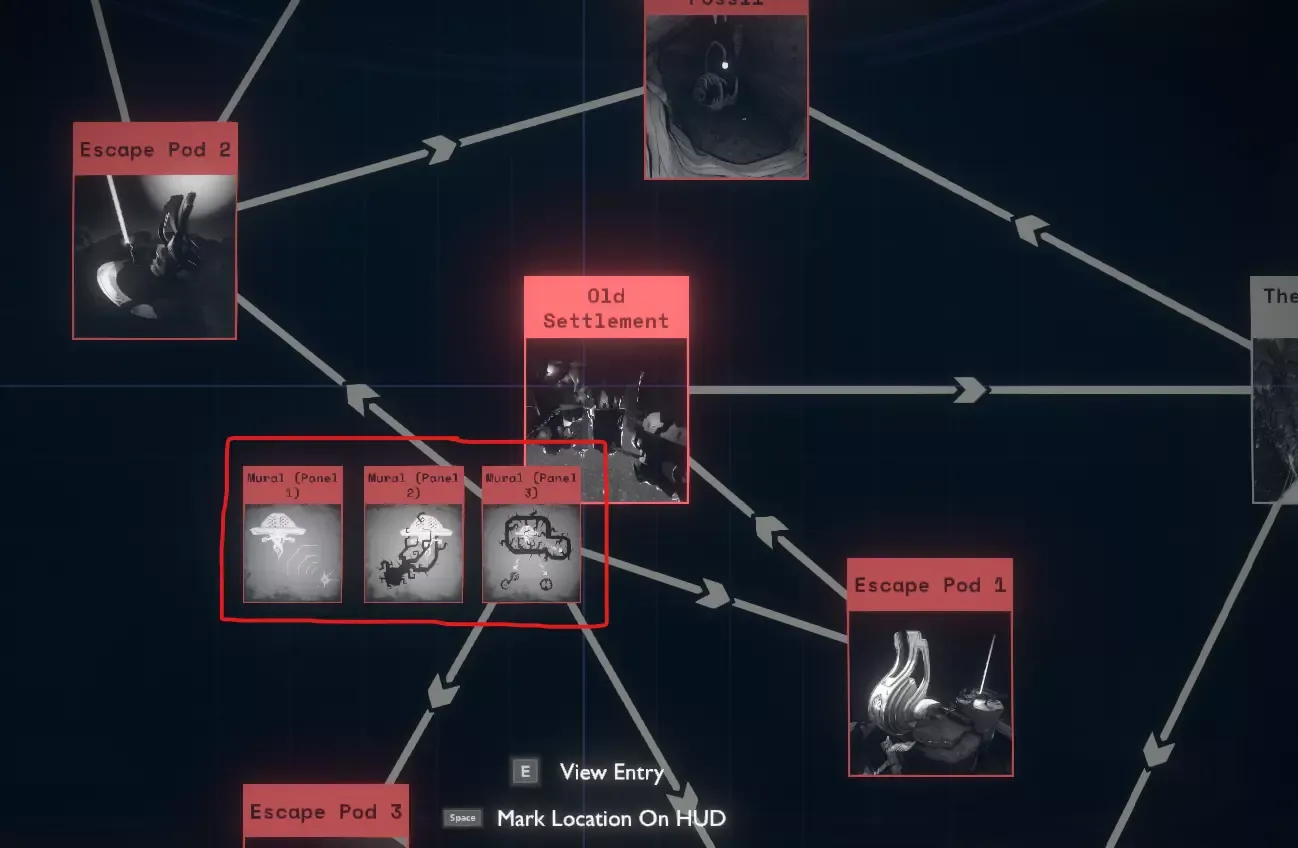 The murals at the old settlement on Brittle Hollow are examples of child entries
Rumor Facts
A rumor fact represents the information you might hear about a specific area or concept, usually, you get these through dialogue or maybe by observing a faraway planet.
Explore Facts
Explore facts represent the information you learn about a specific area or concept.
The XML
Now that we know some terminology, let’s get into how the XML works.
Every planet in the ship log is represented by a single XML file, you can see this if you use the unity explorer mod and
navigate to ShipLogManager.
Example File
<!-- Example File --><!-- All files must have "AstroObjectEntry" as their root element, the xmlns:xsi=... and xsi:noNamespaceSchemaLocation=... is optional but heavily encouraged to reduce errors --><AstroObjectEntry xmlns:xsi="http://www.w3.org/2001/XMLSchema-instance"                  xsi:noNamespaceSchemaLocation="https://raw.githubusercontent.com/Outer-Wilds-New-Horizons/new-horizons/main/NewHorizons/Schemas/shiplog_schema.xsd">    <ID>EXAMPLE_PLANET</ID> <!-- The ID of the planet this xml file is for -->
    <Entry> <!-- An Entry For This Planet -->        <ID>EXAMPLE_ENTRY</ID> <!-- The ID of this entry -->        <Name>Example Planet</Name> <!-- The name to show for this entry both on the card and in map mode -->        <Curiosity>EXAMPLE_ENTRY</Curiosity> <!-- The curiosity this entry belongs to (optional) in this case, it belongs to itself -->        <IsCuriosity/> <!-- Marks this entry as a curiosity, makes it bigger in rumor mode and allows custom colors -->        <IgnoreMoreToExplore/> <!-- Don't show a "more to explore" icon -->        <AltPhotoCondition>EXAMPLE_EXPLORE_FACT</AltPhotoCondition> <!-- Show an alternate picture if a fact is known -->
        <RumorFact> <!-- A rumor fact that belongs to this entry -->            <ID>EXAMPLE_RUMOR_FACT</ID> <!-- The ID of this fact -->            <RumorName>Cool Rock RUMOR</RumorName> <!-- The name of the rumor this fact relates to -->            <Text>Example Rumor Text</Text> <!-- The Text to display for this fact -->        </RumorFact>
        <ExploreFact> <!-- An explore fact that belongs to this entry -->            <ID>EXAMPLE_EXPLORE_FACT</ID> <!-- The ID of this fact -->            <Text>Example Explore Fact <![CDATA[<color=orange>This is orange</color>]]></Text> <!-- The Text to display for this fact, notice how you can use color just like in dialogue -->            <AltText> <!-- Text to display for this fact if another fact is known -->                <Text><![CDATA[<color=blue>Different Text To Display</color>]]></Text> <!-- The text to display -->                <Condition>EXAMPLE_CHILD_RUMOR_FACT</Condition> <!-- The fact that needs to be known to make this text display -->            </AltText>        </ExploreFact>
        <Entry> <!-- Makes a child of this entry (displays smaller in rumor mode and indented in map mode) -->            <ID>EXAMPLE_CHILD_ENTRY</ID> <!-- The ID of this child entry -->            <Name>Example Child Entry</Name> <!-- The name of this child entry -->            <Curiosity>COOL_ROCK</Curiosity> <!-- The curiosity of this child entry -->
            <!-- Create some facts for this child entry -->            <RumorFact>                <ID>EXAMPLE_CHILD_RUMOR_FACT</ID>                <RumorName>Example Child Rumor Fact</RumorName>                <Text>Example Child Rumor Fact Text</Text>            </RumorFact>
            <ExploreFact>                <ID>EXAMPLE_CHILD_EXPLORE_FACT</ID>                <Text>Example Child Explore Fact Text</Text>            </ExploreFact>        </Entry>    </Entry>
    <Entry> <!-- Create another entry -->        <ID>EXAMPLE_ENTRY_2</ID> <!-- Make sure IDs are unique! -->        <Name>Example Entry 2</Name>        <Curiosity>EXAMPLE_ENTRY</Curiosity> <!-- Set this entry's curiosity to the other one we defined -->        <IgnoreMoreToExploreCondition>EXAMPLE_EXPLORE_FACT_2</IgnoreMoreToExploreCondition> <!-- Don't show a more to explore icon if a fact is known -->
        <!-- Make some facts for this second entry -->        <RumorFact>            <ID>EXAMPLE_RUMOR_FACT_2</ID>            <SourceID>EXAMPLE_ENTRY</SourceID> <!-- Set SourceID to connect a line from one entry to another -->            <RumorName>Example Rumor Fact 2</RumorName>            <Text>Example Rumor Fact 2</Text>        </RumorFact>
        <ExploreFact>            <ID>EXAMPLE_EXPLORE_FACT_2</ID>            <Text>Example Explore Fact 2</Text>        </ExploreFact>
        <ExploreFact>            <ID>EXAMPLE_EXPLORE_FACT_3</ID>            <Text>Example Explore Fact 3</Text>        </ExploreFact>    </Entry></AstroObjectEntry>
Using The Schema
In the example XML, you may notice something like xsi:noNamespaceSchemaLocation at the top, this tells whatever editor
you’re using that the file at that link is the schema. The game simply ignores this though, so it won’t be able to catch
errors at runtime.
Some editors may require you to Trust the workspace to use
the schema file. Doing this varies per-editor, and you may also have to right-click the link and click download.
Loading The File
You can load your XML file to your planet by doing adding the following to your planet’s config
{ "ShipLog": { "xmlFile": "planets/example.xml" }}Rumor Mode Options
Entry Layout
By default, entries in rumor mode are laid out by rows, where each row is one planet. This will not make for a perfect
layout, so you can use the entryPositions property in your star system config to change them.
For example, if I want to change an entry with the ID of EXAMPLE_ENTRY and another with the ID of EXAMPLE_ENTRY_2:
{ "entryPositions": [ { "id": "EXAMPLE_ENTRY", "position": { "x": 100, "y": 200 } }, { "id": "EXAMPLE_ENTRY_2", "position": { "x": 200, "y": 100 } } ]}To help with this, download the unity explorer mod and manually position entries (they’re located under Ship_Body/Module_Cabin/Systems_Cabin/ShipLogPivot/ShipLog/ShipLogPivot/ShipLogCanvas/MapMode/ScaleRoot/PanRoot), then simply use the dev tools to dump all the entries to a json string you can copy and paste into your config.
 A set of entries laid out with auto mode
Images
Custom entry images are a bit different from other custom images, instead of pointing to each file for each entry, you point to a folder:
{ "ShipLog": { "xmlFile": "planets/example.xml", "spriteFolder": "planets/example_planet_entry_sprites/" }}Each file is in this folder is then named the ID of each entry.
for example, EXAMPLE_ENTRY’s file would be named EXAMPLE_ENTRY.png.
you set alternate sprites by making a file with the entry’s ID and _ALT at the end, so EXAMPLE_ENTRY’s alt image
would be EXAMPLE_ENTRY_ALT.png.
Curiosity Colors
Colors for each curiosity is given in a list within the star system config, so if I wanted the curiosity EXAMPLE_ENTRY to have a color of blue:
{ "curiosities": [ { "id": "EXAMPLE_ENTRY", "color": { "r": 0, "g": 0, "b": 100, "a": 255 }, "highlightColor": { "r": 0, "g": 1, "b": 255, "a": 255 } } ]} The curiosity’s color is changed to blue
Map Mode Options
Layout
Layout in map mode can be handled in two different ways, either manual or automatic, if you try to mix them you’ll get
an error.
Also, adding planets to the vanilla solar system requires you to use manual layout.
Automatic Layout
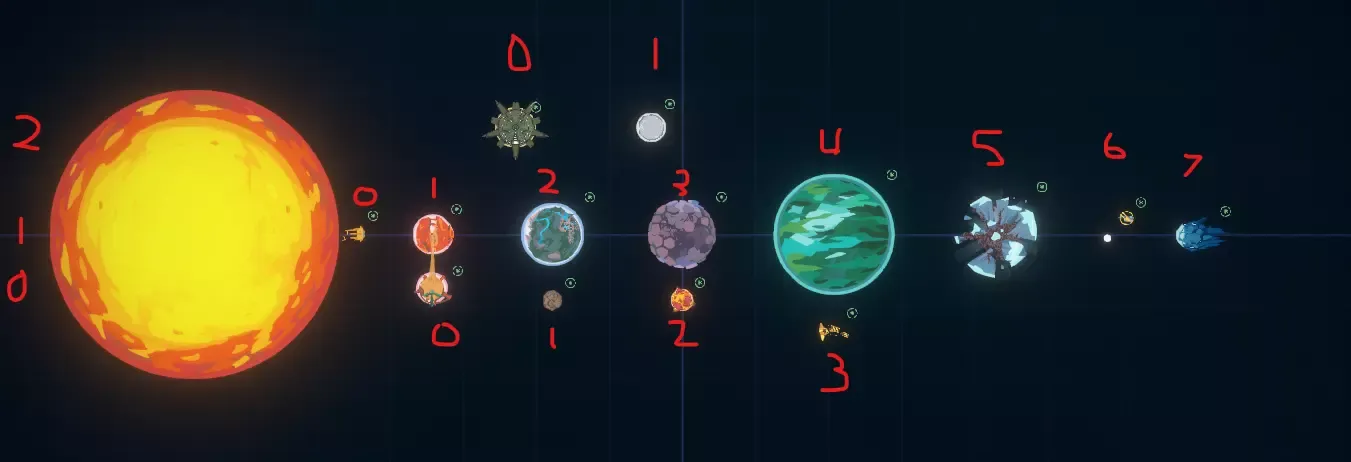
In automatic layout, each planet that orbits the center of the solar system is put in a row, then, each planet orbiting those planets are put in a column, then, each planet orbiting those planets are put in a row for as many planets there are. The order of each planet is determined by their semi-major axis, if two planets have the same semi-major axis then they’re sorted by order loaded in.
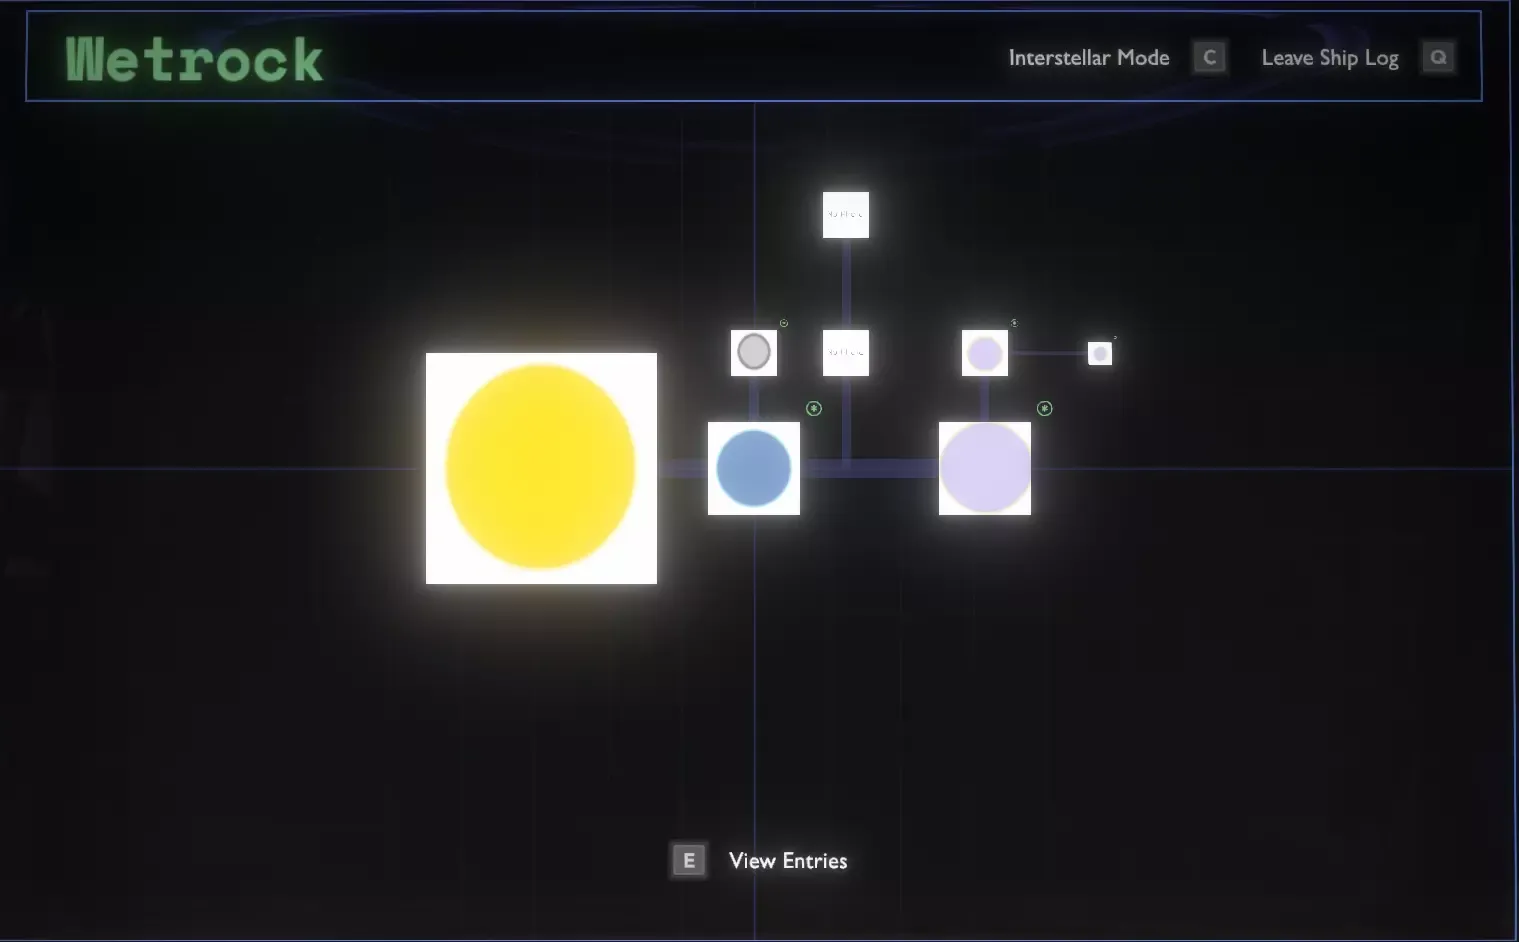 An example system laid out with auto mode
Offset
The offset option lets you adjust a planet’s offset from the last planet.
{ "ShipLog": { "xmlFile": "planets/example.xml", "mapMode": { "offset": -5.0 } }}For example, this offsets example planet in map mode by -5 units.
Manual Layout
The manual layout is a lot more involved than automatic but offers much greater freedom.
Manual layout requires you to fill out both manualPosition and manualNavigationPosition
Manual Position
Setting the manualPosition option in the mapMode object sets its position (if manual position isn’t set, it assumes
the planet is using automatic mode)
{ "ShipLog": { "xmlFile": "planets/example.xml", "mapMode": { "manualPosition": { "x": 0, "y": 500 }, "manualNavigationPosition": {} } }}Manual Navigation Position
This setting tells Outer Wilds how to handle navigation for this object, the x and y values correlate to the row and column of this planet. For example, the sun station is at navigationPosition (0, 1) as it is in the first column on the second row (you can’t select the sun, so it doesn’t have a row or column). So, by making a navigation position of:
{ "ShipLog": { "xmlFile": "planets/example.xml", "mapMode": { "manualPosition": { "x": 0, "y": 500 }, "manualNavigationPosition": { "x": 1, "y": 1 } } }}We say this planet is to the right of the sun station (putting in a position that is already occupied will override what is in that position).
Overriding Vanilla Planets
You can also move vanilla planets by creating configs with their names and changing their manualPosition and manualNavigationPosition
Settings for both layouts
These settings can be used for both type of layouts
Sprites
Reveal Sprite
A path to the sprite to show for when the planet is revealed
Outline Sprite
A path to an outline to show for when the planet is undiscovered
Invisible When Hidden
Settings invisibleWhenHidden to true makes the planet entirely invisible when not discovered instead of showing an
outline.
Scale
How much to scale this planet in the map mode screen (you may have to change offset to compensate)
{ "ShipLog": { "xmlFile": "planets/example.xml", "mapMode": { "scale": 0.5 } }}Shrinks the planet by one half
Remove
Don’t include this planet in map mode at all, simply ignore it
Details
Details are images that go on top of a planet in map mode, and changes states with the planet (like the sand funnel between Ash Twin and Ember Twin)
{ "ShipLog": { "xmlFile": "planets/example.xml", "mapMode": { "details": [ { "revealedSprite": "planets/assets/image.png", "outlineSprite": "planets/assets/outline.png", "invisibleWhenHidden": true, "rotation": 45, "scale": { "x": 0.2, "y": 0.2 }, "position": { "x": 20, "y": 10 } } ] } }}As you can see, they have similar properties to planets, with the addition of rotation
Revealing Facts
Of course, having a custom ship log is neat and all, but what use is it if the player can’t unlock it?
Initial Reveal
You can set facts to reveal as soon as the player enters the system by adding the initialReveal property to your star system config
{ "initialReveal": ["EXAMPLE_RUMOR_FACT"]}Signal Discovery
You can set a fact to reveal as soon as a signal is identified by editing the signal’s reveals attribute
{ "Props": { "signals": [ { "frequency": "Quantum", "name": "Quantum Planet", "audio": "OW_QuantumSignal", "sourceRadius": 1000, "reveals": "EXAMPLE_EXPLORE_FACT" } ] }}Dialogue
You can set a fact to reveal in dialogue with the <RevealFacts> tag
<!-- Example Dialogue --><DialogueNode>    <Name>1</Name>    <Dialogue>        <Page>Check your ship log!</Page>    </Dialogue>    <RevealFacts>        <FactID>EXAMPLE_EXPLORE_FACT</FactID>    </RevealFacts>
    <DialogueOptionsList>        <!-- ... -->    </DialogueOptionsList></DialogueNode>
Reveal Volumes
Reveal volumes are triggers/colliders in the world that can unlock facts from a variety of actions.
Reveal volumes are specified in the Volumes module, its key is revealVolumes.
Position
The position of the reveal volume, relative to this planet’s center
Radius
How big the collider is (use the collider visualizer mod for help)
Reveals
A list of facts this volume reveals
Reveal On
Can be any of the following:
Enter
When the player or probe enters the trigger, reveal the facts
Observe
When the player observes the trigger, reveal the facts
Snapshot
When the player takes a picture of the trigger, reveal the facts
Max Distance
Can only be used if revealOn is set to Observe or Snapshot, the max distance away the player can be and still be able
to trigger the reveal
Max Angle
Can only be used if revealOn is set to Observe, the max angle the player can be looking away from the trigger to still
trigger the reveal
Example
{ "Volumes": { "revealVolumes": [ { "position": { "x": -55.65454, "y": 83.1335, "z": 2.7004 }, "revealOn": "snapshot", "reveals": ["EXAMPLE_EXPLORE_FACT", "EXAMPLE_EXPLORE_FACT_2"], "radius": 5.0 } ] }}Setting Entry Locations
Entry locations are the “Mark On HUD” option you see when in map mode, this allows the player to go back to where they
were in the event of the big funny.
Adding an entry location is similar to adding a Reveal Volume:
{ "Props": { "entryLocation": [ { "id": "EXAMPLE_ENTRY", "position": { "x": -55.65454, "y": 83.1335, "z": 2.7004 }, "cloaked": false } ] }}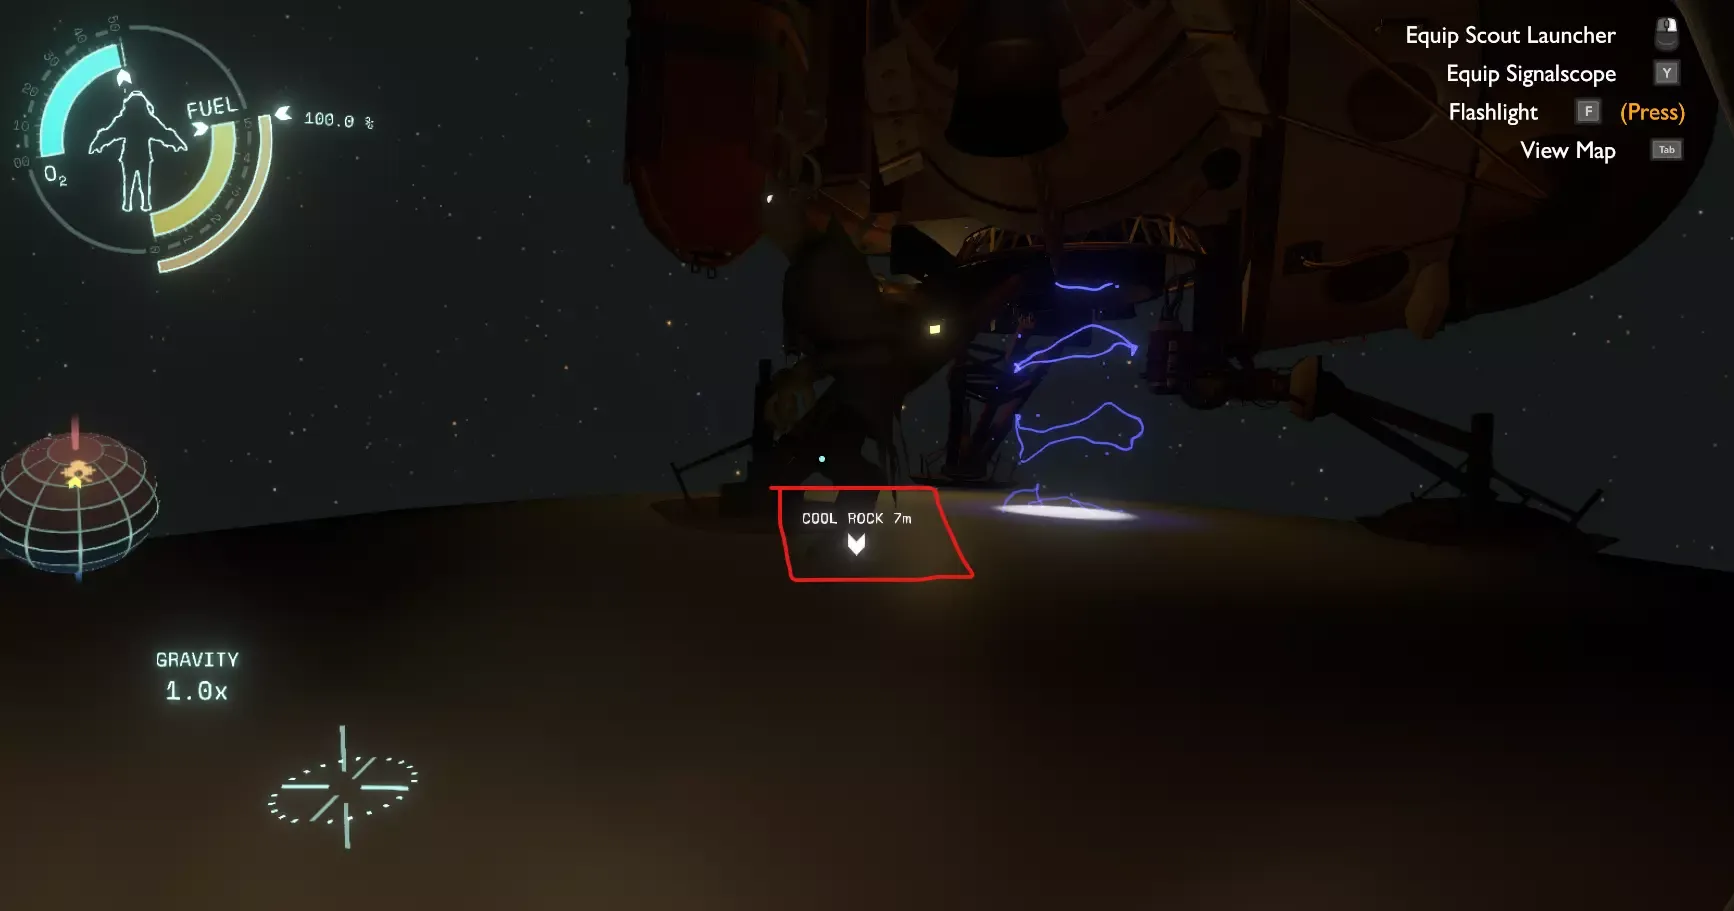
Extending Base Game Entries
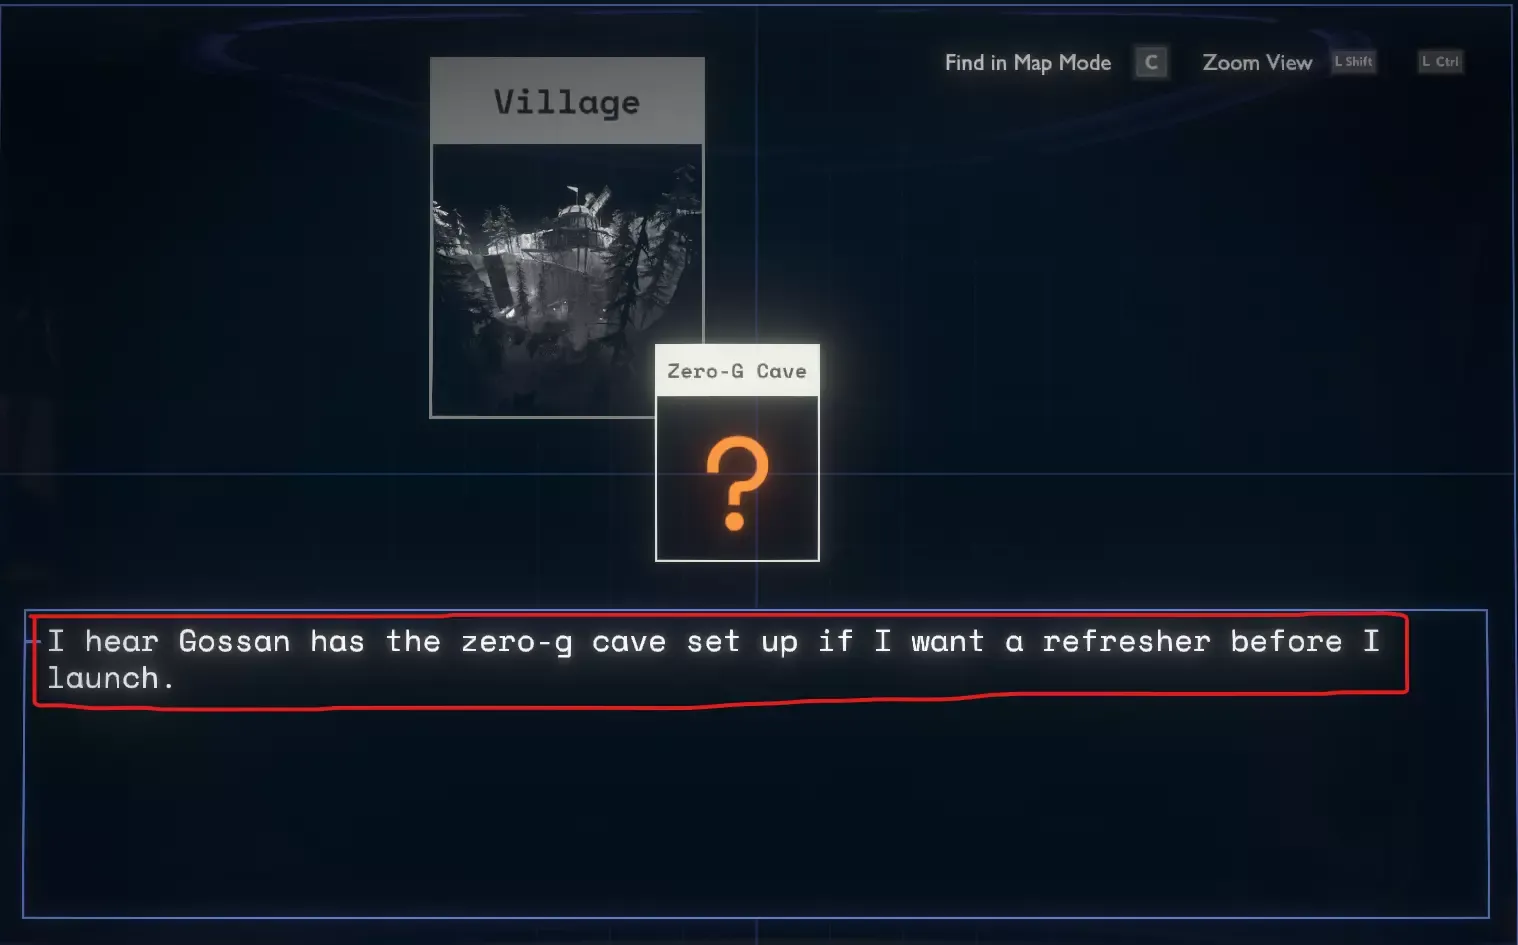
You can add new facts and sub-entries to existing ship log entries by adding a dummy entry to your ship log XML file with the same ID as an existing entry. Any facts and sub-entries will be applied to the existing entry. For example, to extend the “Village” entry on Timber Hearth (which has the internal ID “TH_VILLAGE”):
<AstroObjectEntry xmlns:xsi="http://www.w3.org/2001/XMLSchema-instance" xsi:noNamespaceSchemaLocation="https://raw.githubusercontent.com/Outer-Wilds-New-Horizons/new-horizons/main/NewHorizons/Schemas/shiplog_schema.xsd"> <ID>TIMBER_HEARTH</ID> <Entry> <ID>TH_VILLAGE</ID> <ExploreFact> <ID>EXAMPLES_VILLAGE</ID> <Text>A lot of unfamiliar characters are hanging around the village now.</Text> </ExploreFact> <Entry> <ID>EXAMPLES_DREAM</ID> <Name>Wetrock Dream</Name> <ExploreFact> <ID>EXAMPLES_DREAM_EXPLORED</ID> <Text>I dreamed about Wetrock using a green campfire.</Text> </ExploreFact> </Entry> </Entry></AstroObjectEntry>